Learn How to Remove Duplicates with PixDuplicate
Optimize your image collection using PixDuplicate. This guide teaches you how to find and eliminate duplicate and similar images effortlessly.

Mastering PixDuplicate: A Comprehensive Guide to Finding and Removing Duplicate Images
In today’s digital age, maintaining an organized image library is essential, especially for photographers and designers. This tutorial provides a detailed, step-by-step approach to using PixDuplicate, a powerful tool designed to help you identify and eliminate duplicate images from your collection. Follow along to streamline your image management and enhance your workflow!
Step 1: Finding a Single Duplicate Image
To begin, let’s explore how to locate a specific duplicate image within your system. Follow these steps:
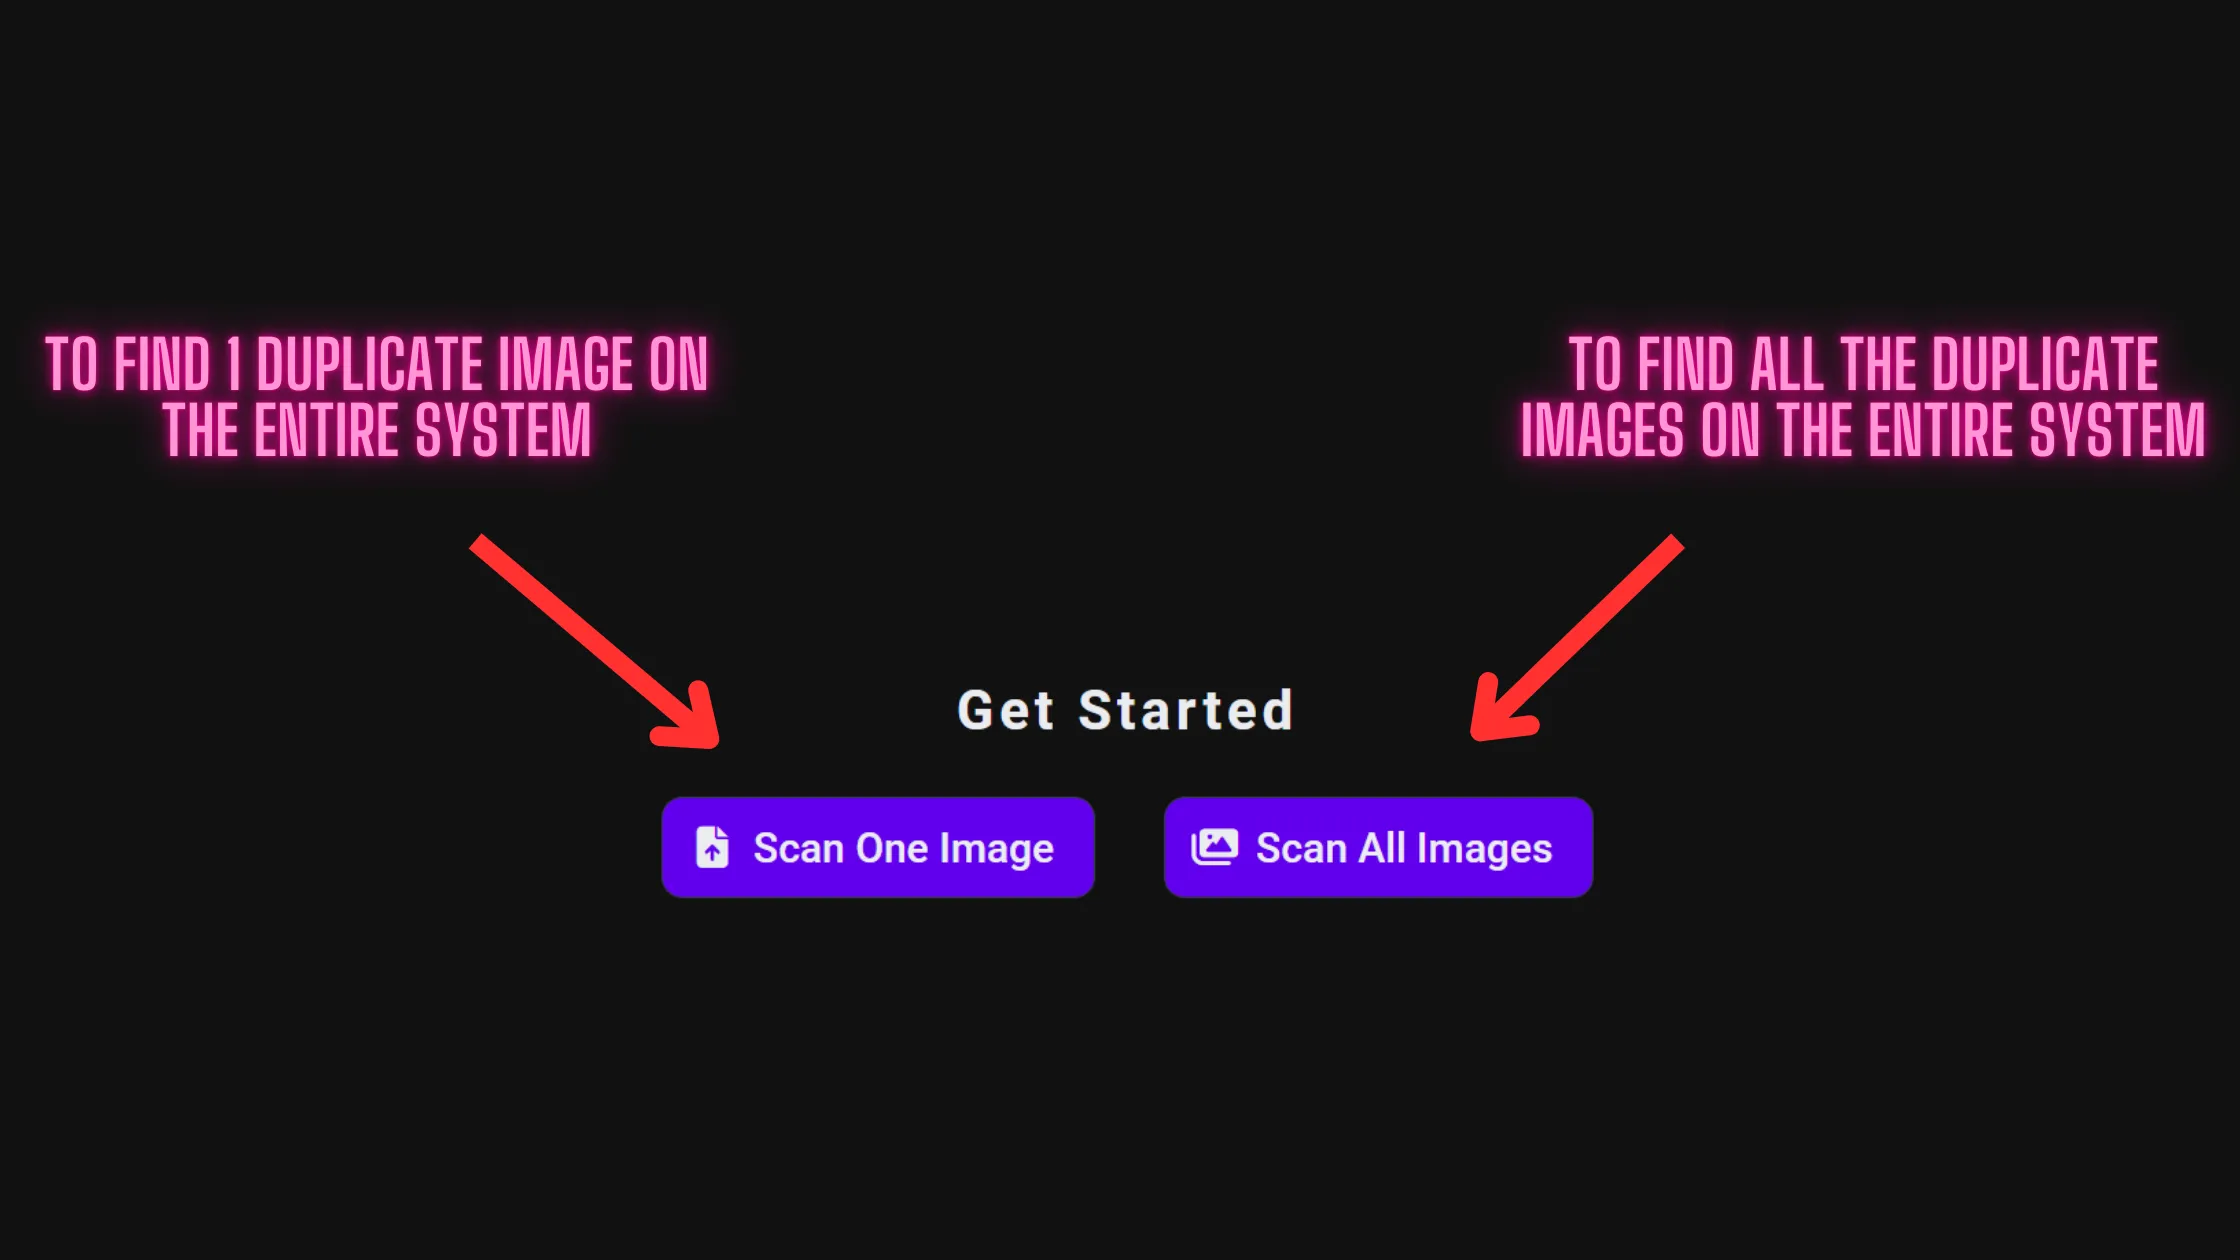
Click the “Scan One Image” Button: Locate and click the “Scan One Image” button to initiate the search, as depicted in the image below.
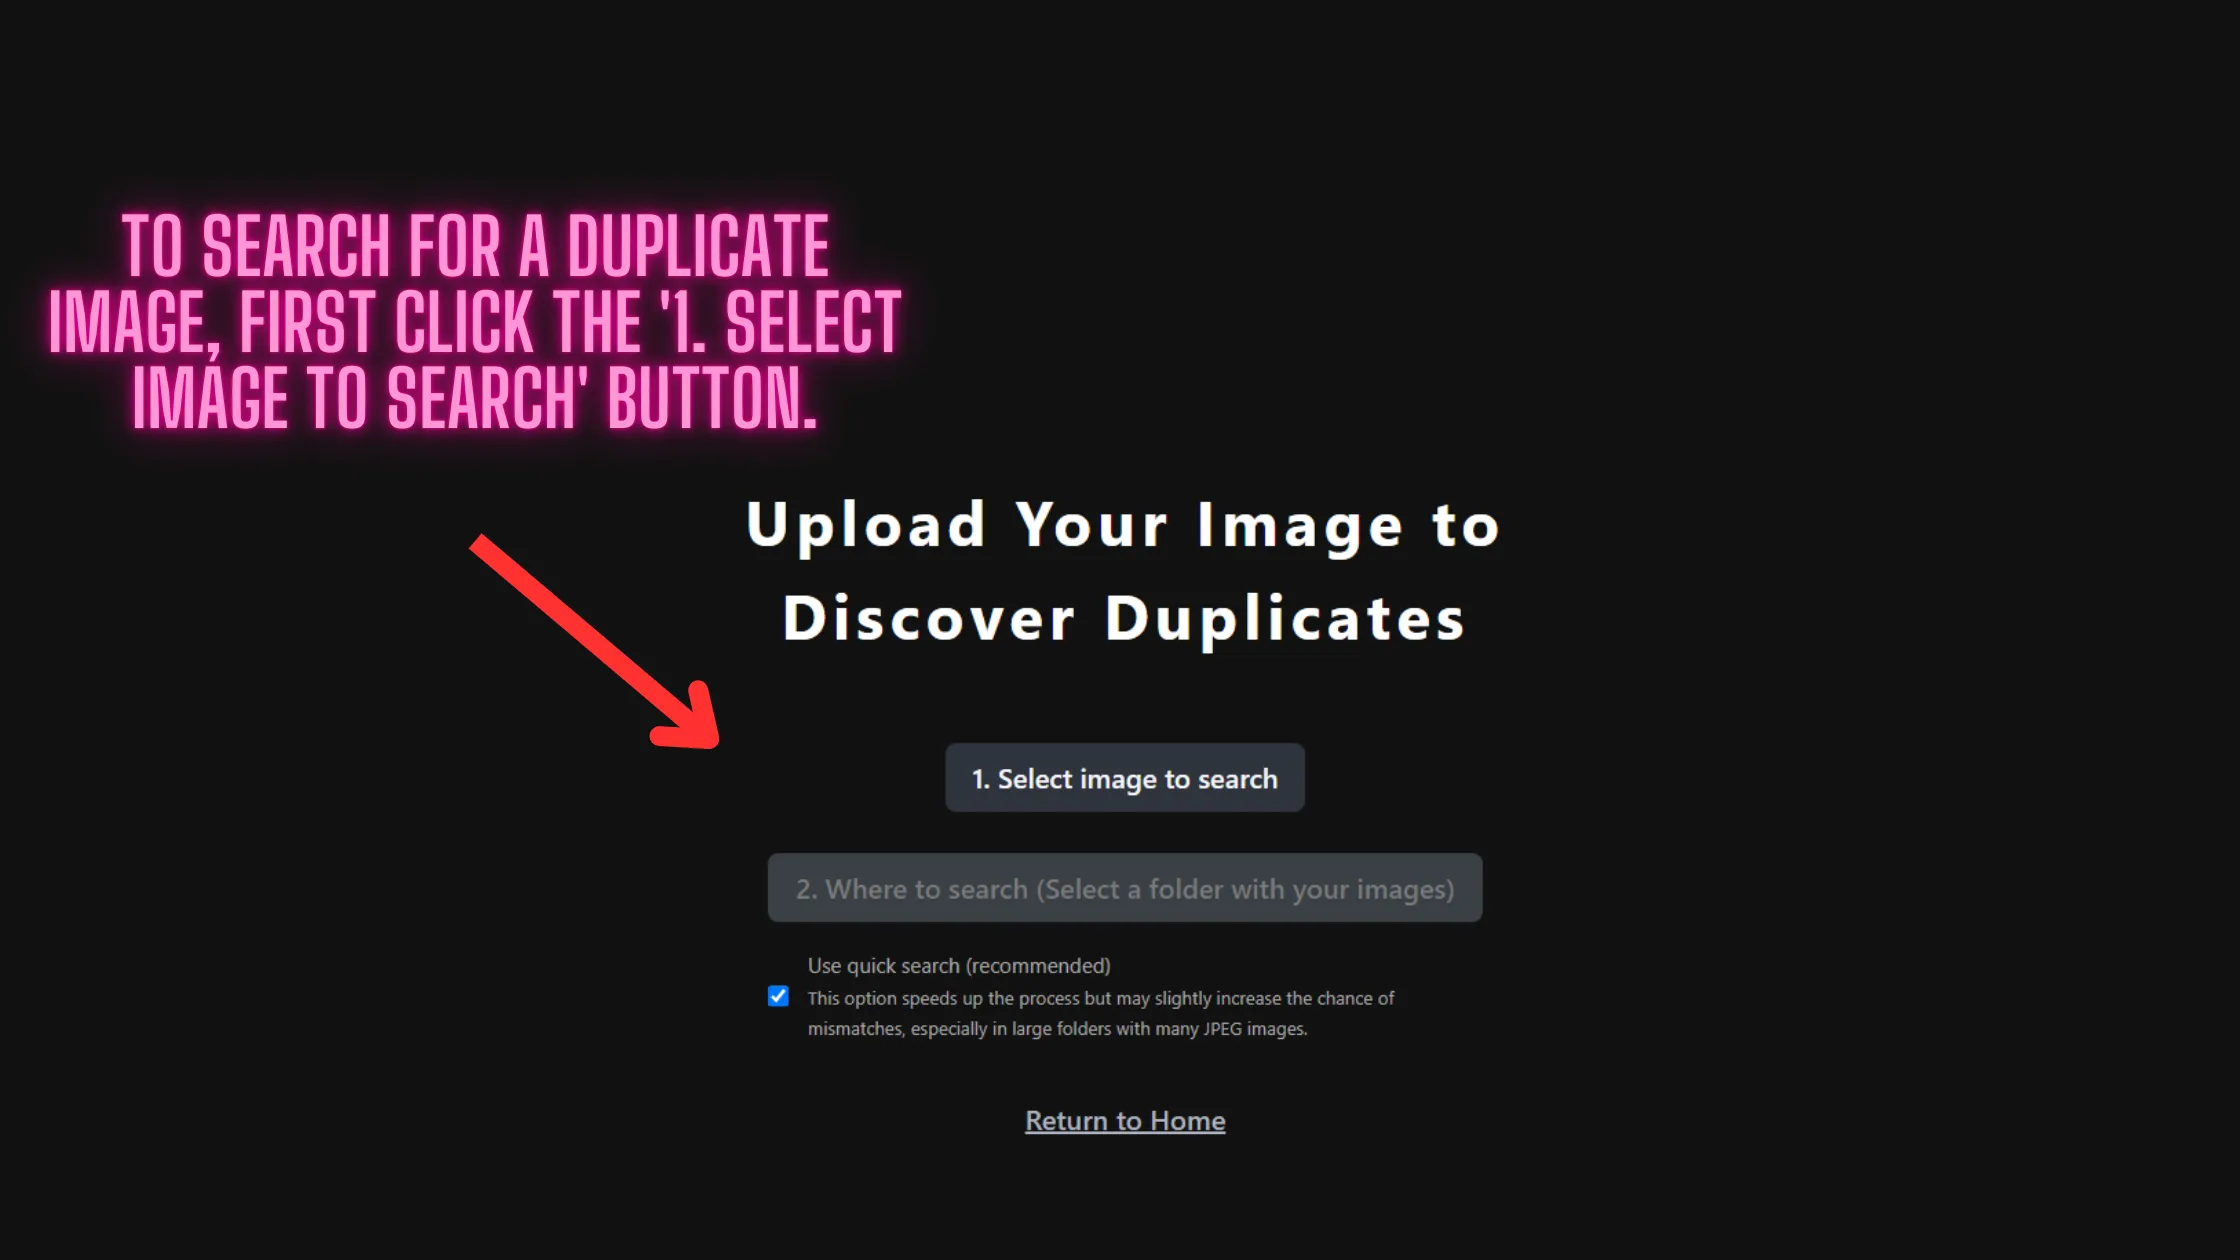
Select the Image to Search: Next, click on the “1. Select image to search” button and choose the image that you suspect has duplicates, as shown here.
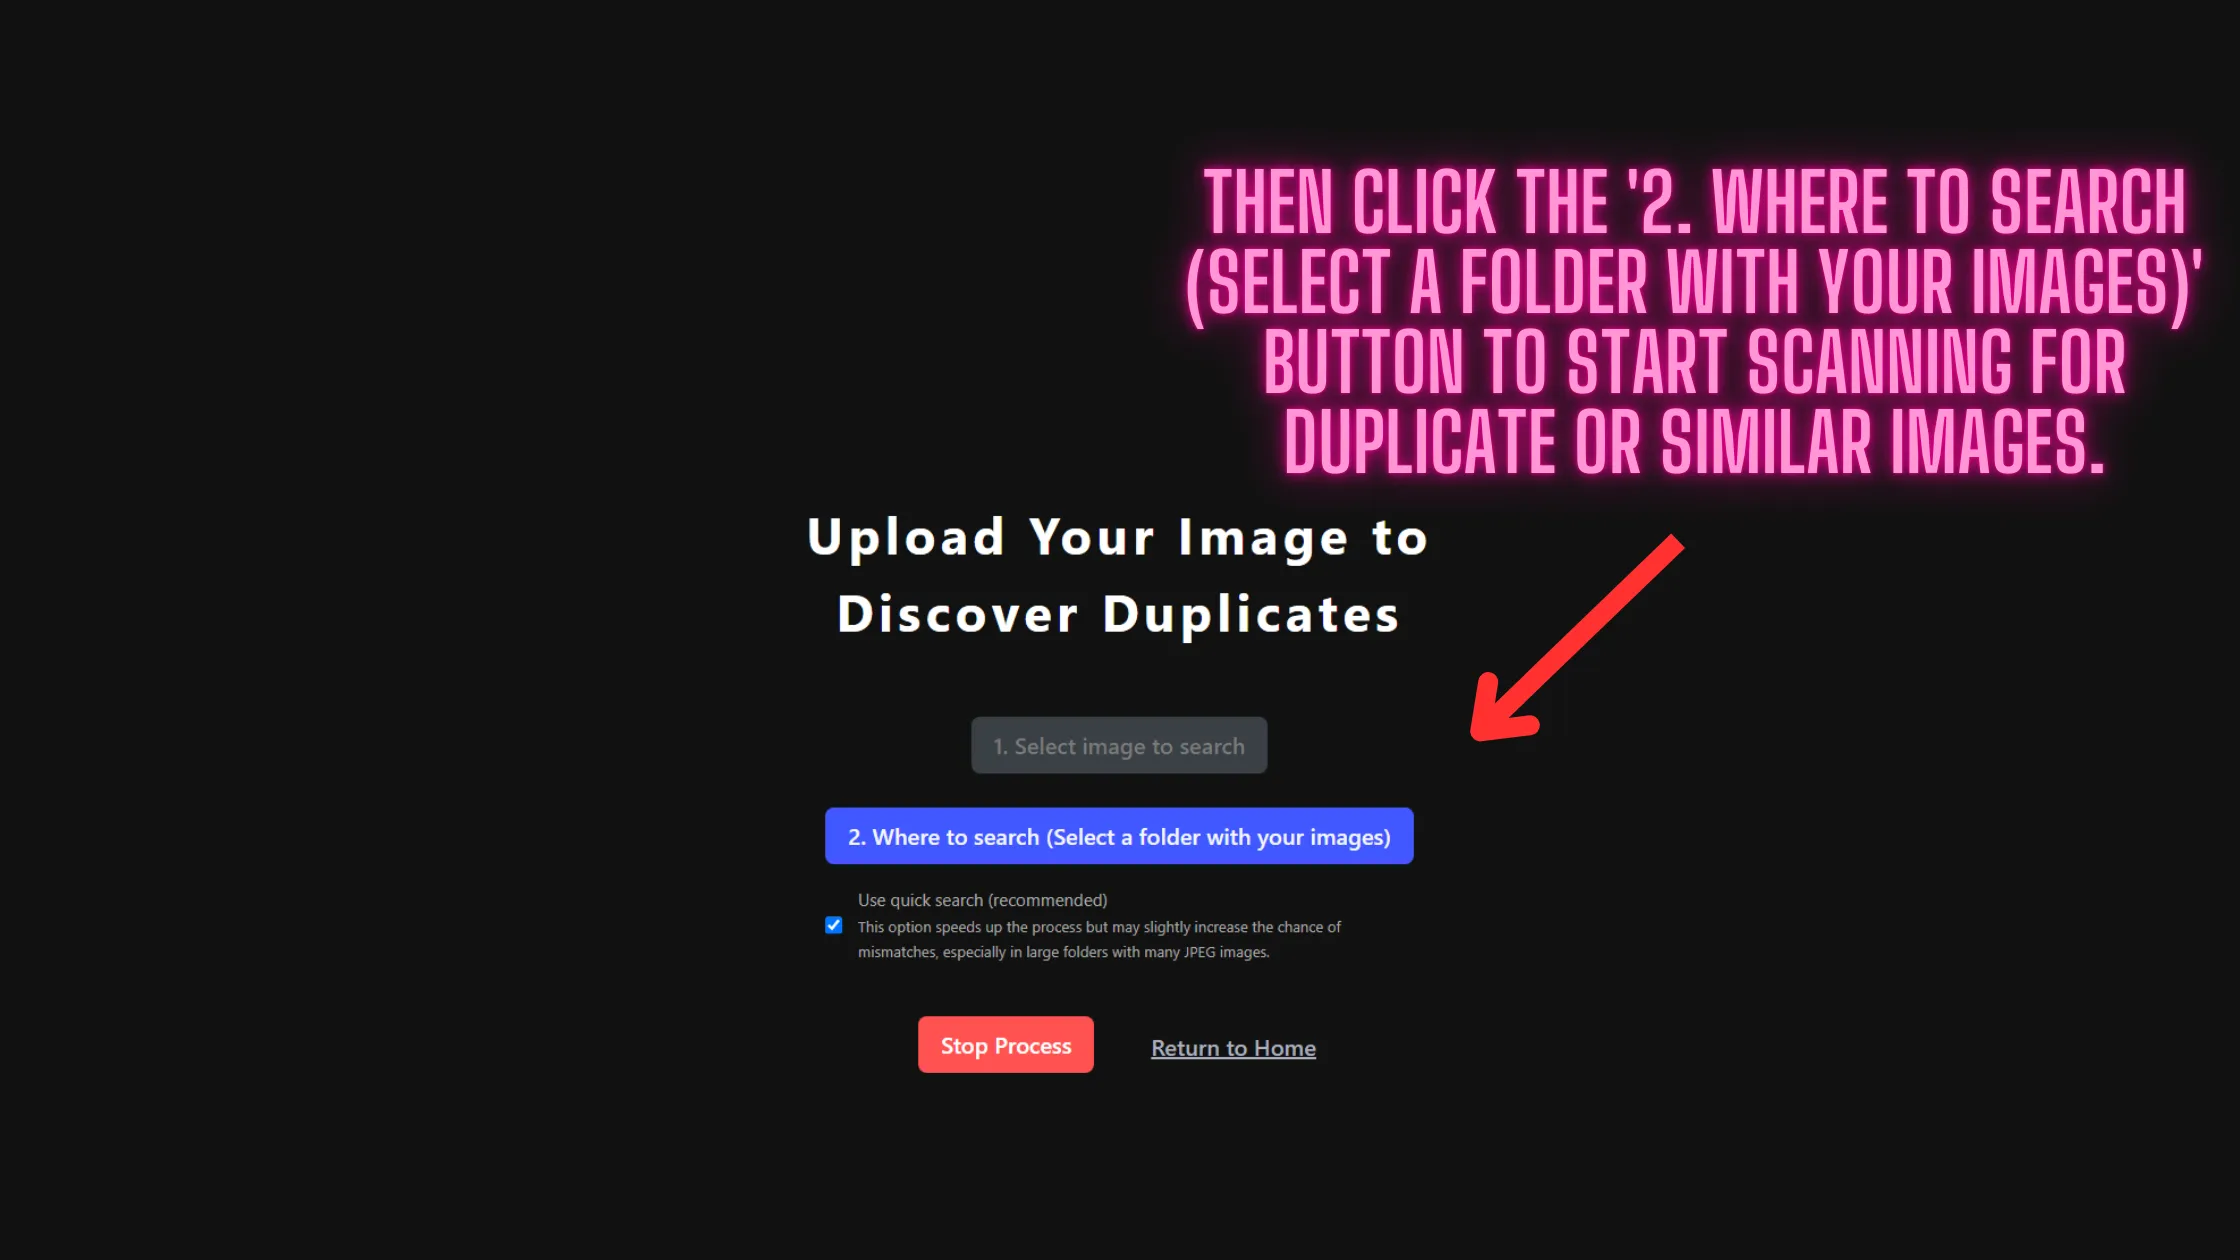
Choose a Folder to Scan: Click the blue-highlighted button labeled “2. Where to search (Select a folder with your images)” to select the folder containing the image. This will start the scanning process for similar images.
Example of a Duplicate Image: For demonstration purposes, here’s the duplicate image we’re searching for in the selected folder:

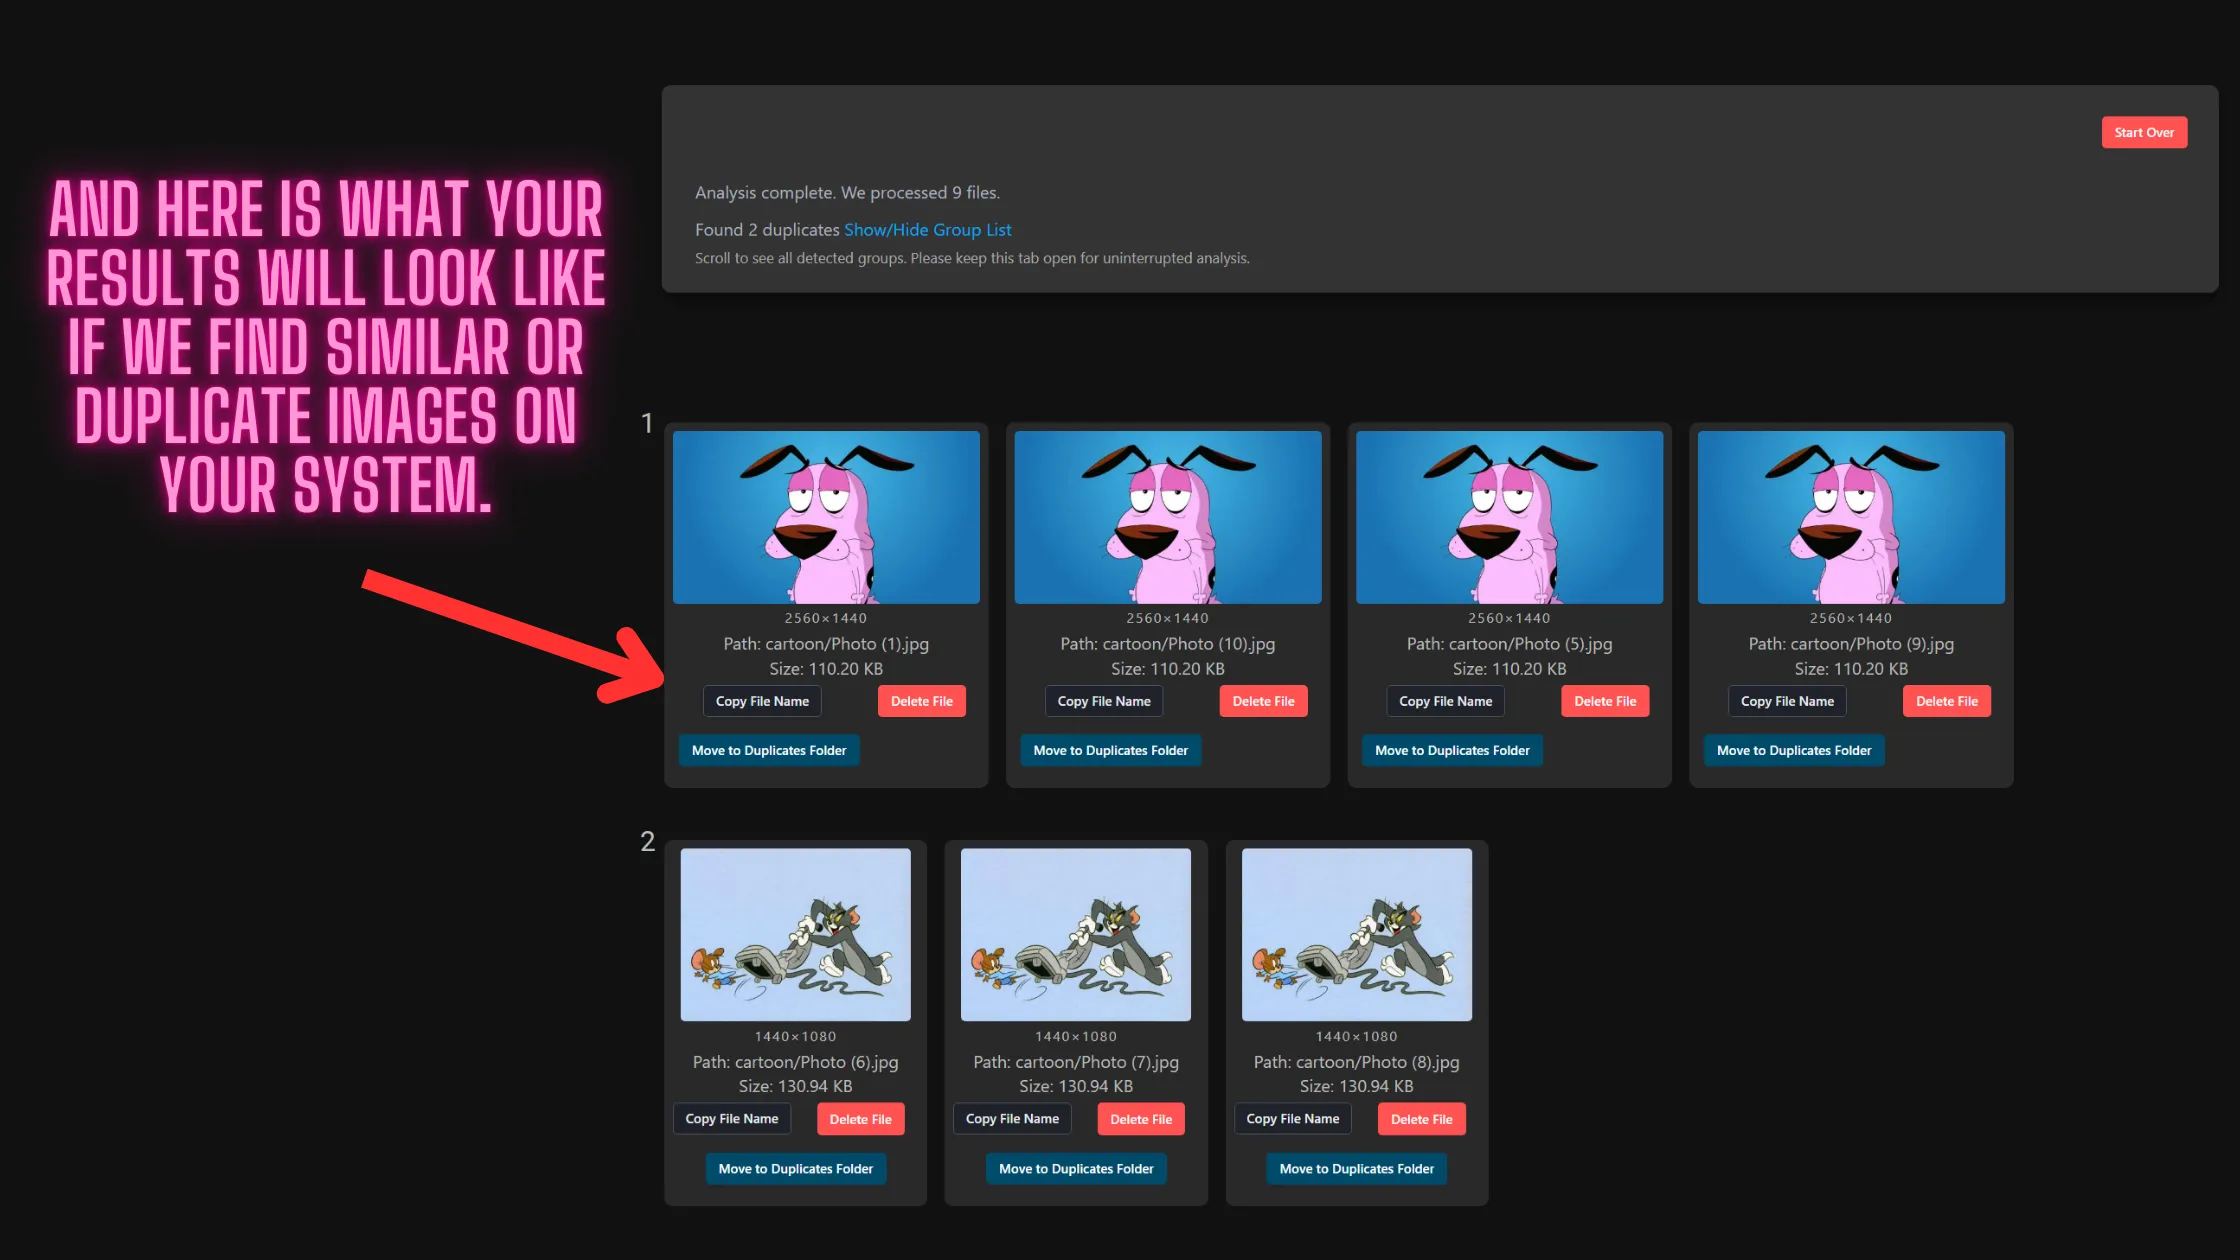
Review Scan Results: Once the scan is complete, the results screen will display any similar or duplicate images detected by the algorithm.
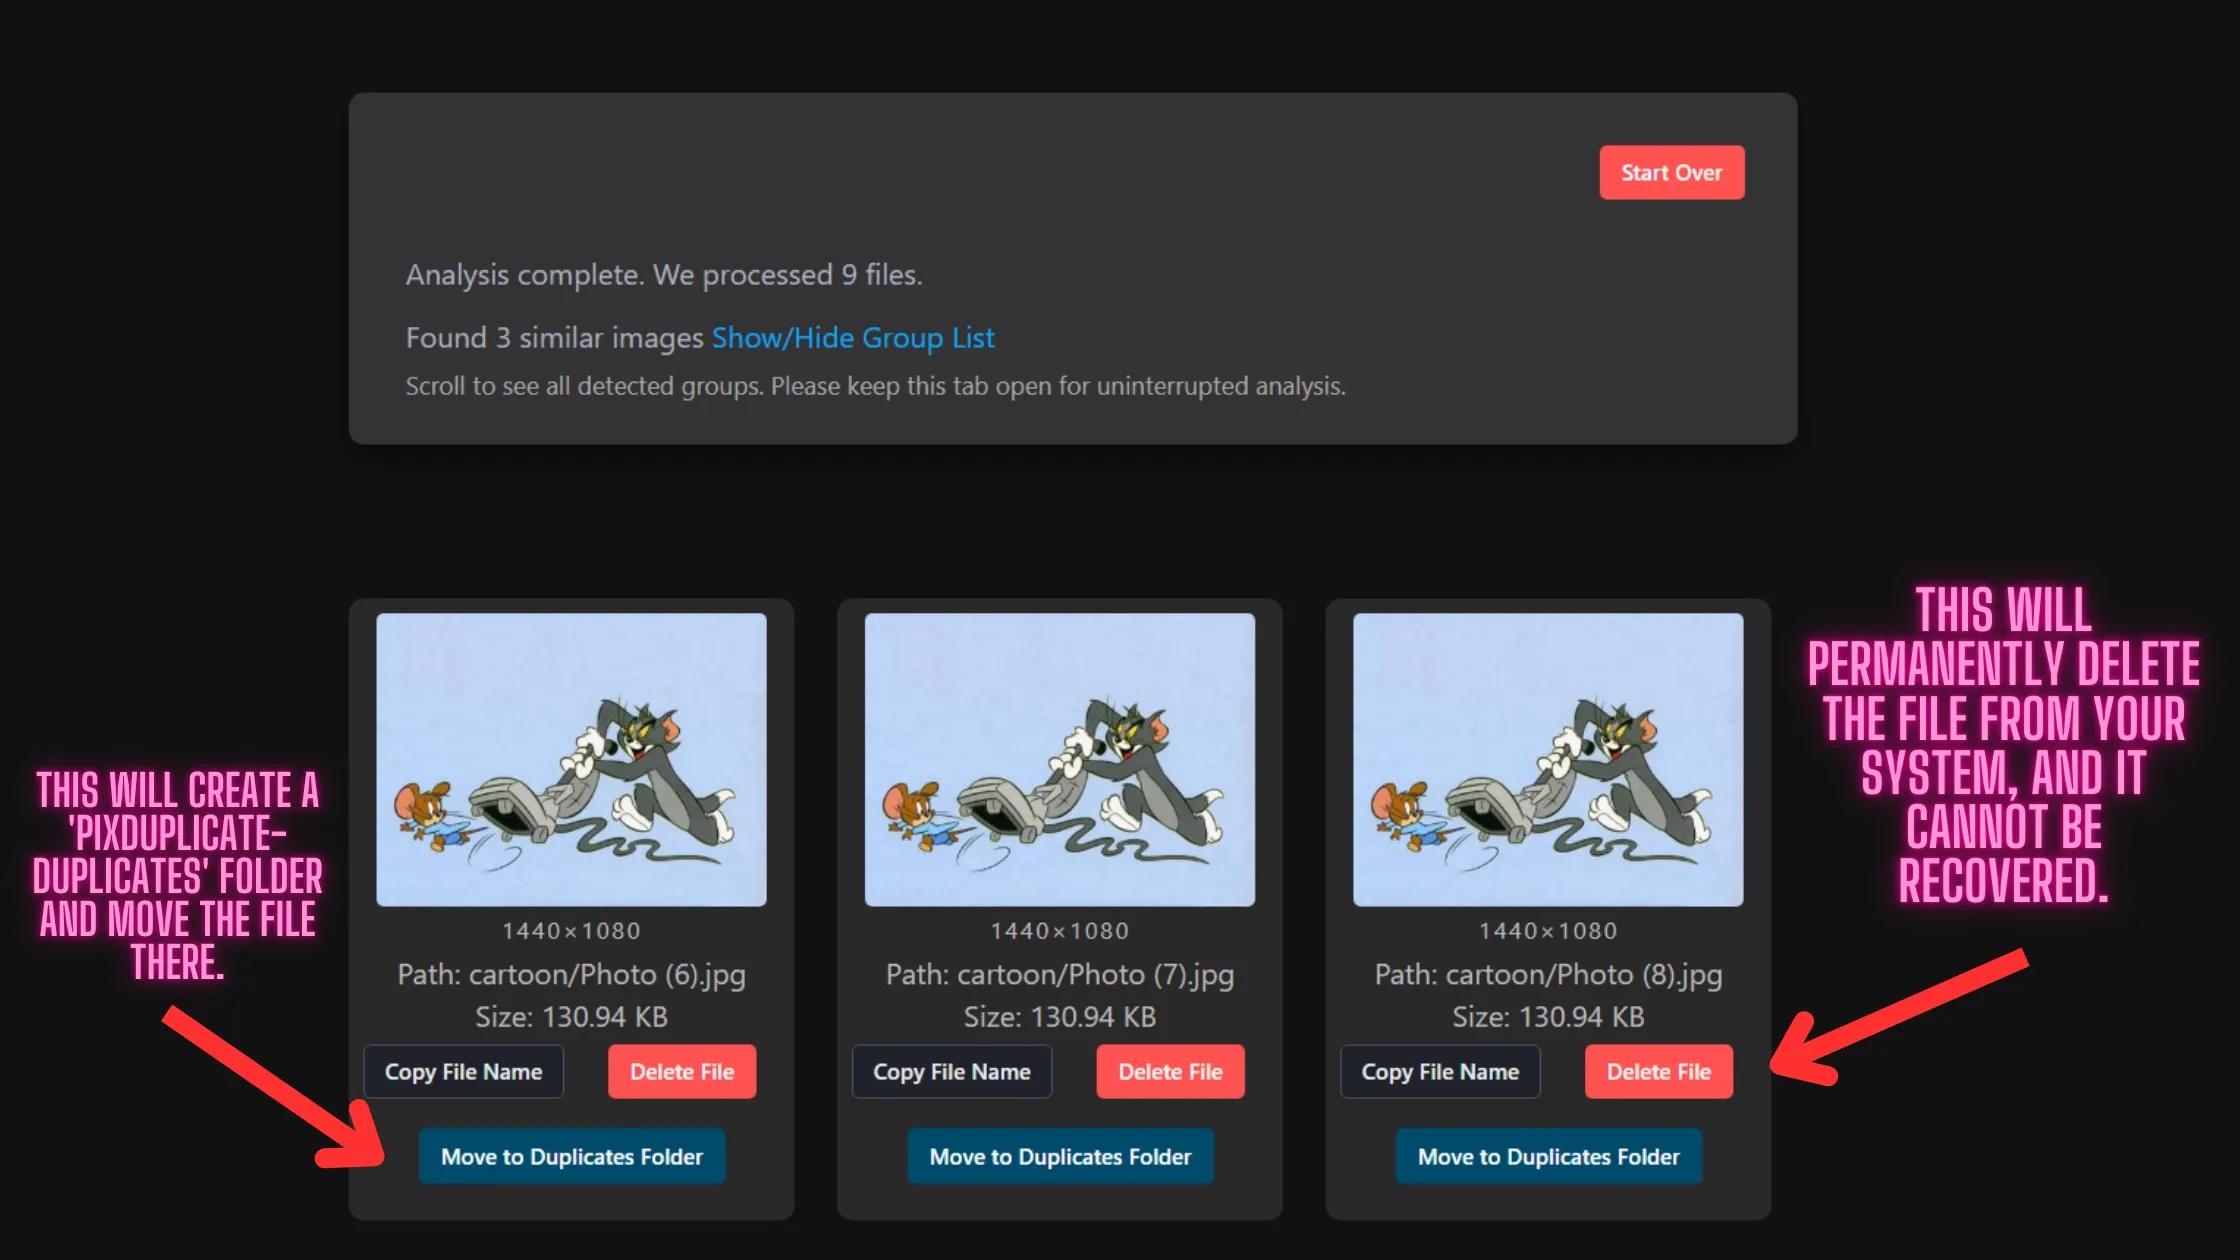
Managing Found Duplicates
After identifying duplicates, you have several options for managing them:
- Delete: Permanently remove the image from your system (warning: this action cannot be undone).
- Copy the File Name: Easily copy the name of the file for your records.
- Move to Duplicates Folder: Create a new folder named “PixDuplicate-Duplicates” and relocate the duplicate image there (this option is contingent upon browser support).
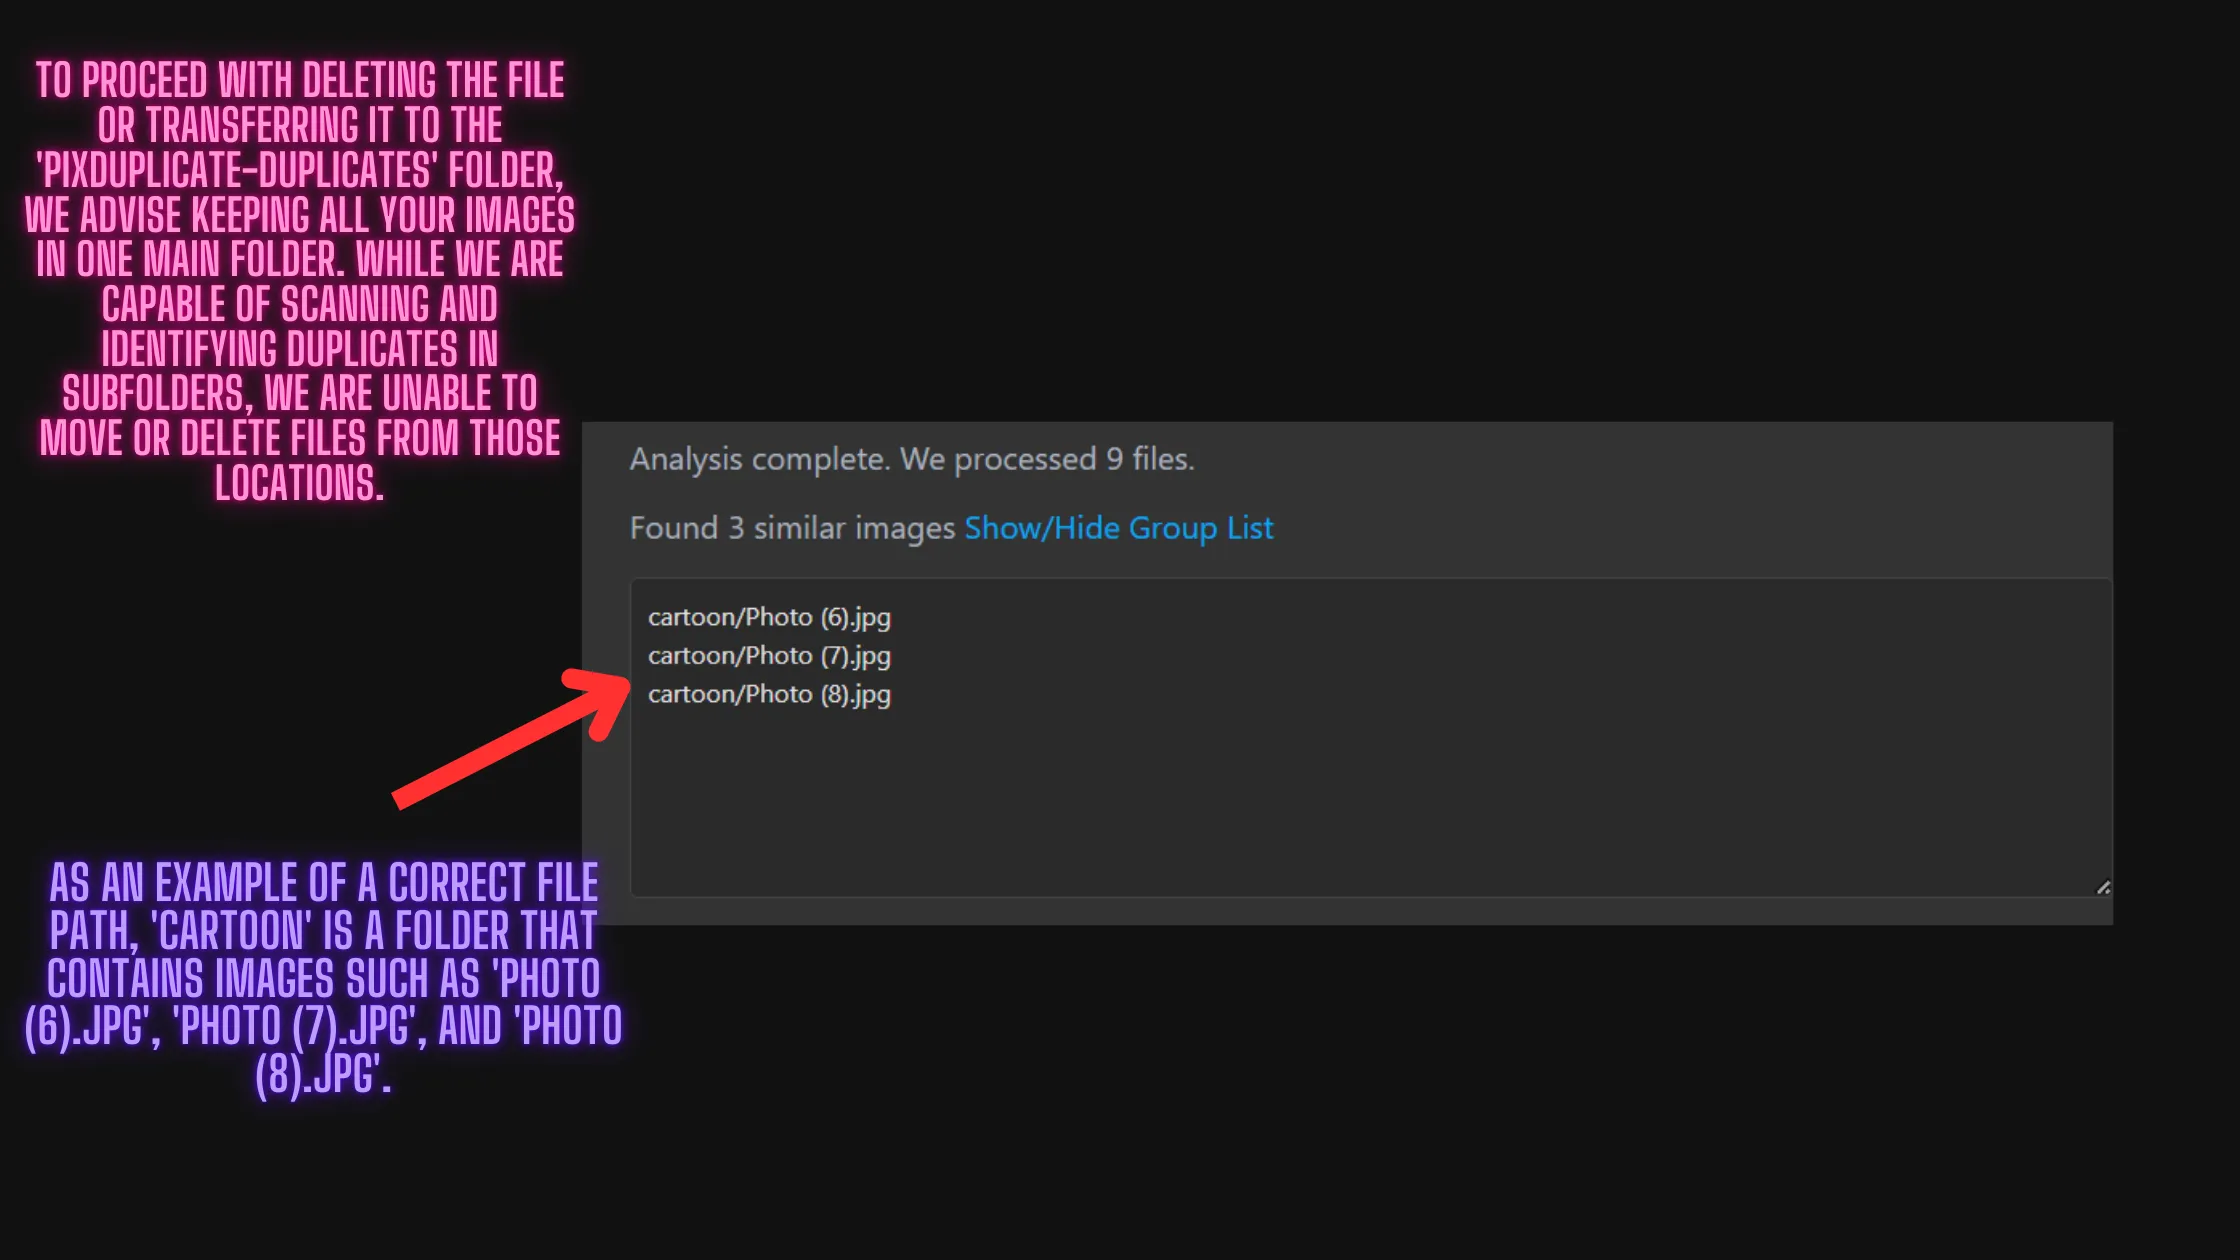
Important Note: For deleting or moving image files effectively, it’s advisable to keep the images within the same main folder. You may scan and identify duplicates located in subfolders, but moving or deleting files from those locations is not supported.
Here’s a glimpse of the file path and folder structure for better understanding:
Step 2: Scanning for All Similar or Duplicate Images
If you’re looking to conduct a comprehensive scan for all duplicates within your image library, follow these steps:
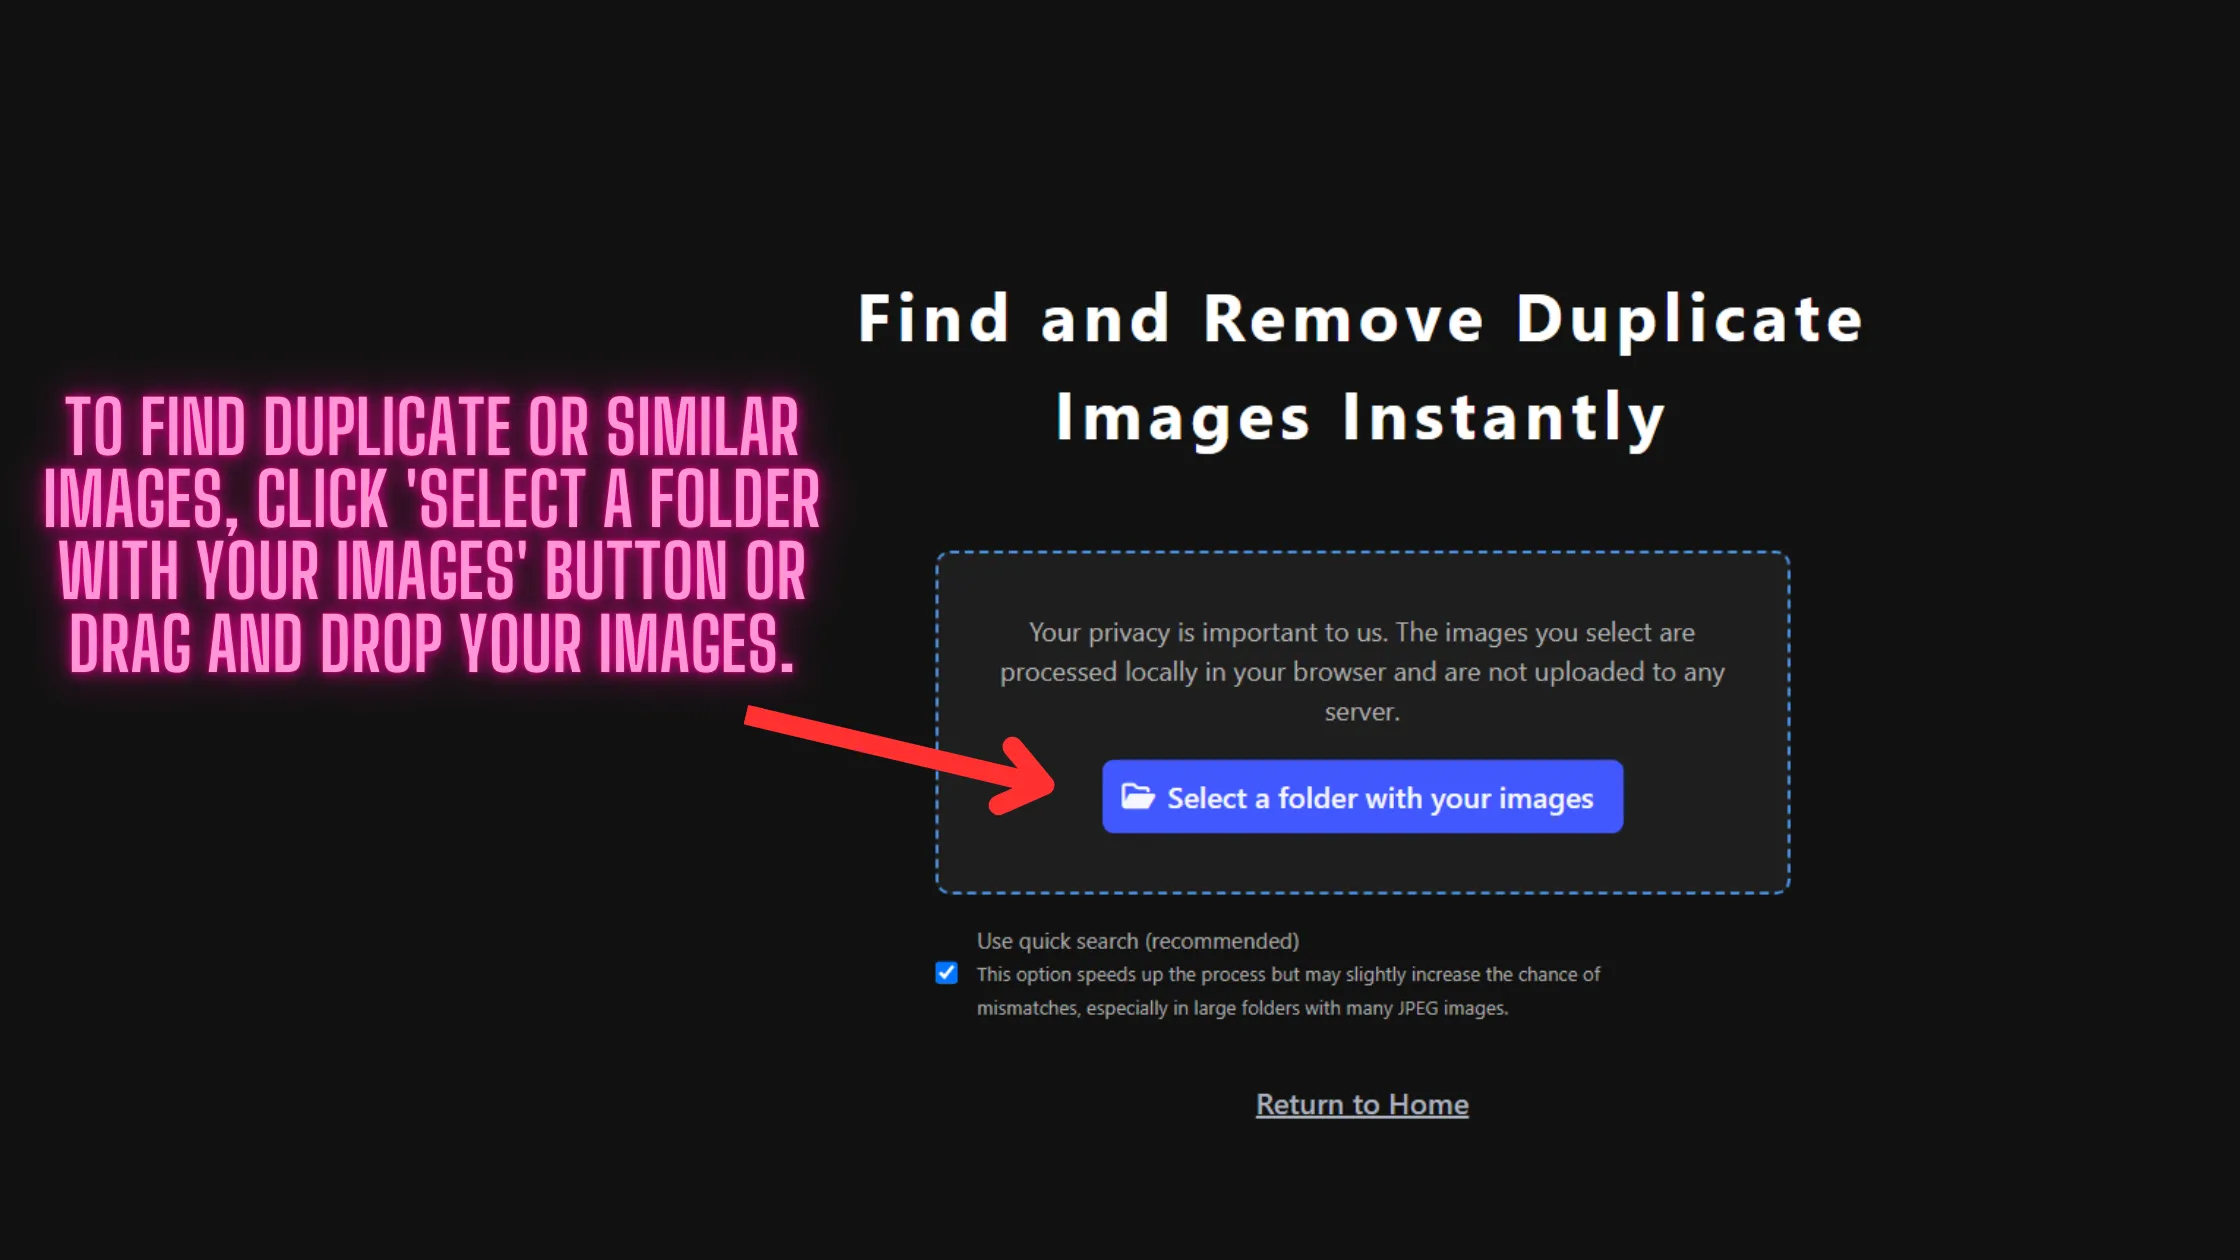
Select a Folder for Complete Scan: Start by clicking the “Select a Folder with Your Images” button or simply drag and drop your images into the interface. Alternatively, return to the homepage and select “Find All Duplicate Images on the Entire System” instead of “Scan One Image.”
Review Complete Scan Results: The results screen will display all duplicates found across the folder. As with the previous scan, you can delete files, copy their names, or move them to the duplicates folder (subject to browser support).